File History: Data Backup for a Windows PC

I’ve previously discussed why making backups, i.e. taking regular copies of your important files is a good idea and so now I want to cover how that can be easily accomplished.

Over the years, Microsoft have included a number of different utilities for making backups, File History is one of two options that have been included with Windows 10 and Windows 11  at no extra cost.  The other option uses OneDrive and I’ll  cover that in a separate post.

Setting up File History

The first thing that you need  in order to get File History up and running is somewhere to store the copies of your data.   This can be an internal disk drive, an external disk drive or a network location.  You could even try using a USB thumb drive.

Once you have established where your backups will be stored, users of Windows 10 can proceed as follows.

Windows 10 File History configuration

Use the following steps to navigate to the Backup configuration screen in the Windows 10 Settings.

  1. Click on the Start button
  2. Click on Settings (the gear / cog icon)
  3. Click on Update & Security
  4. Click on Backup

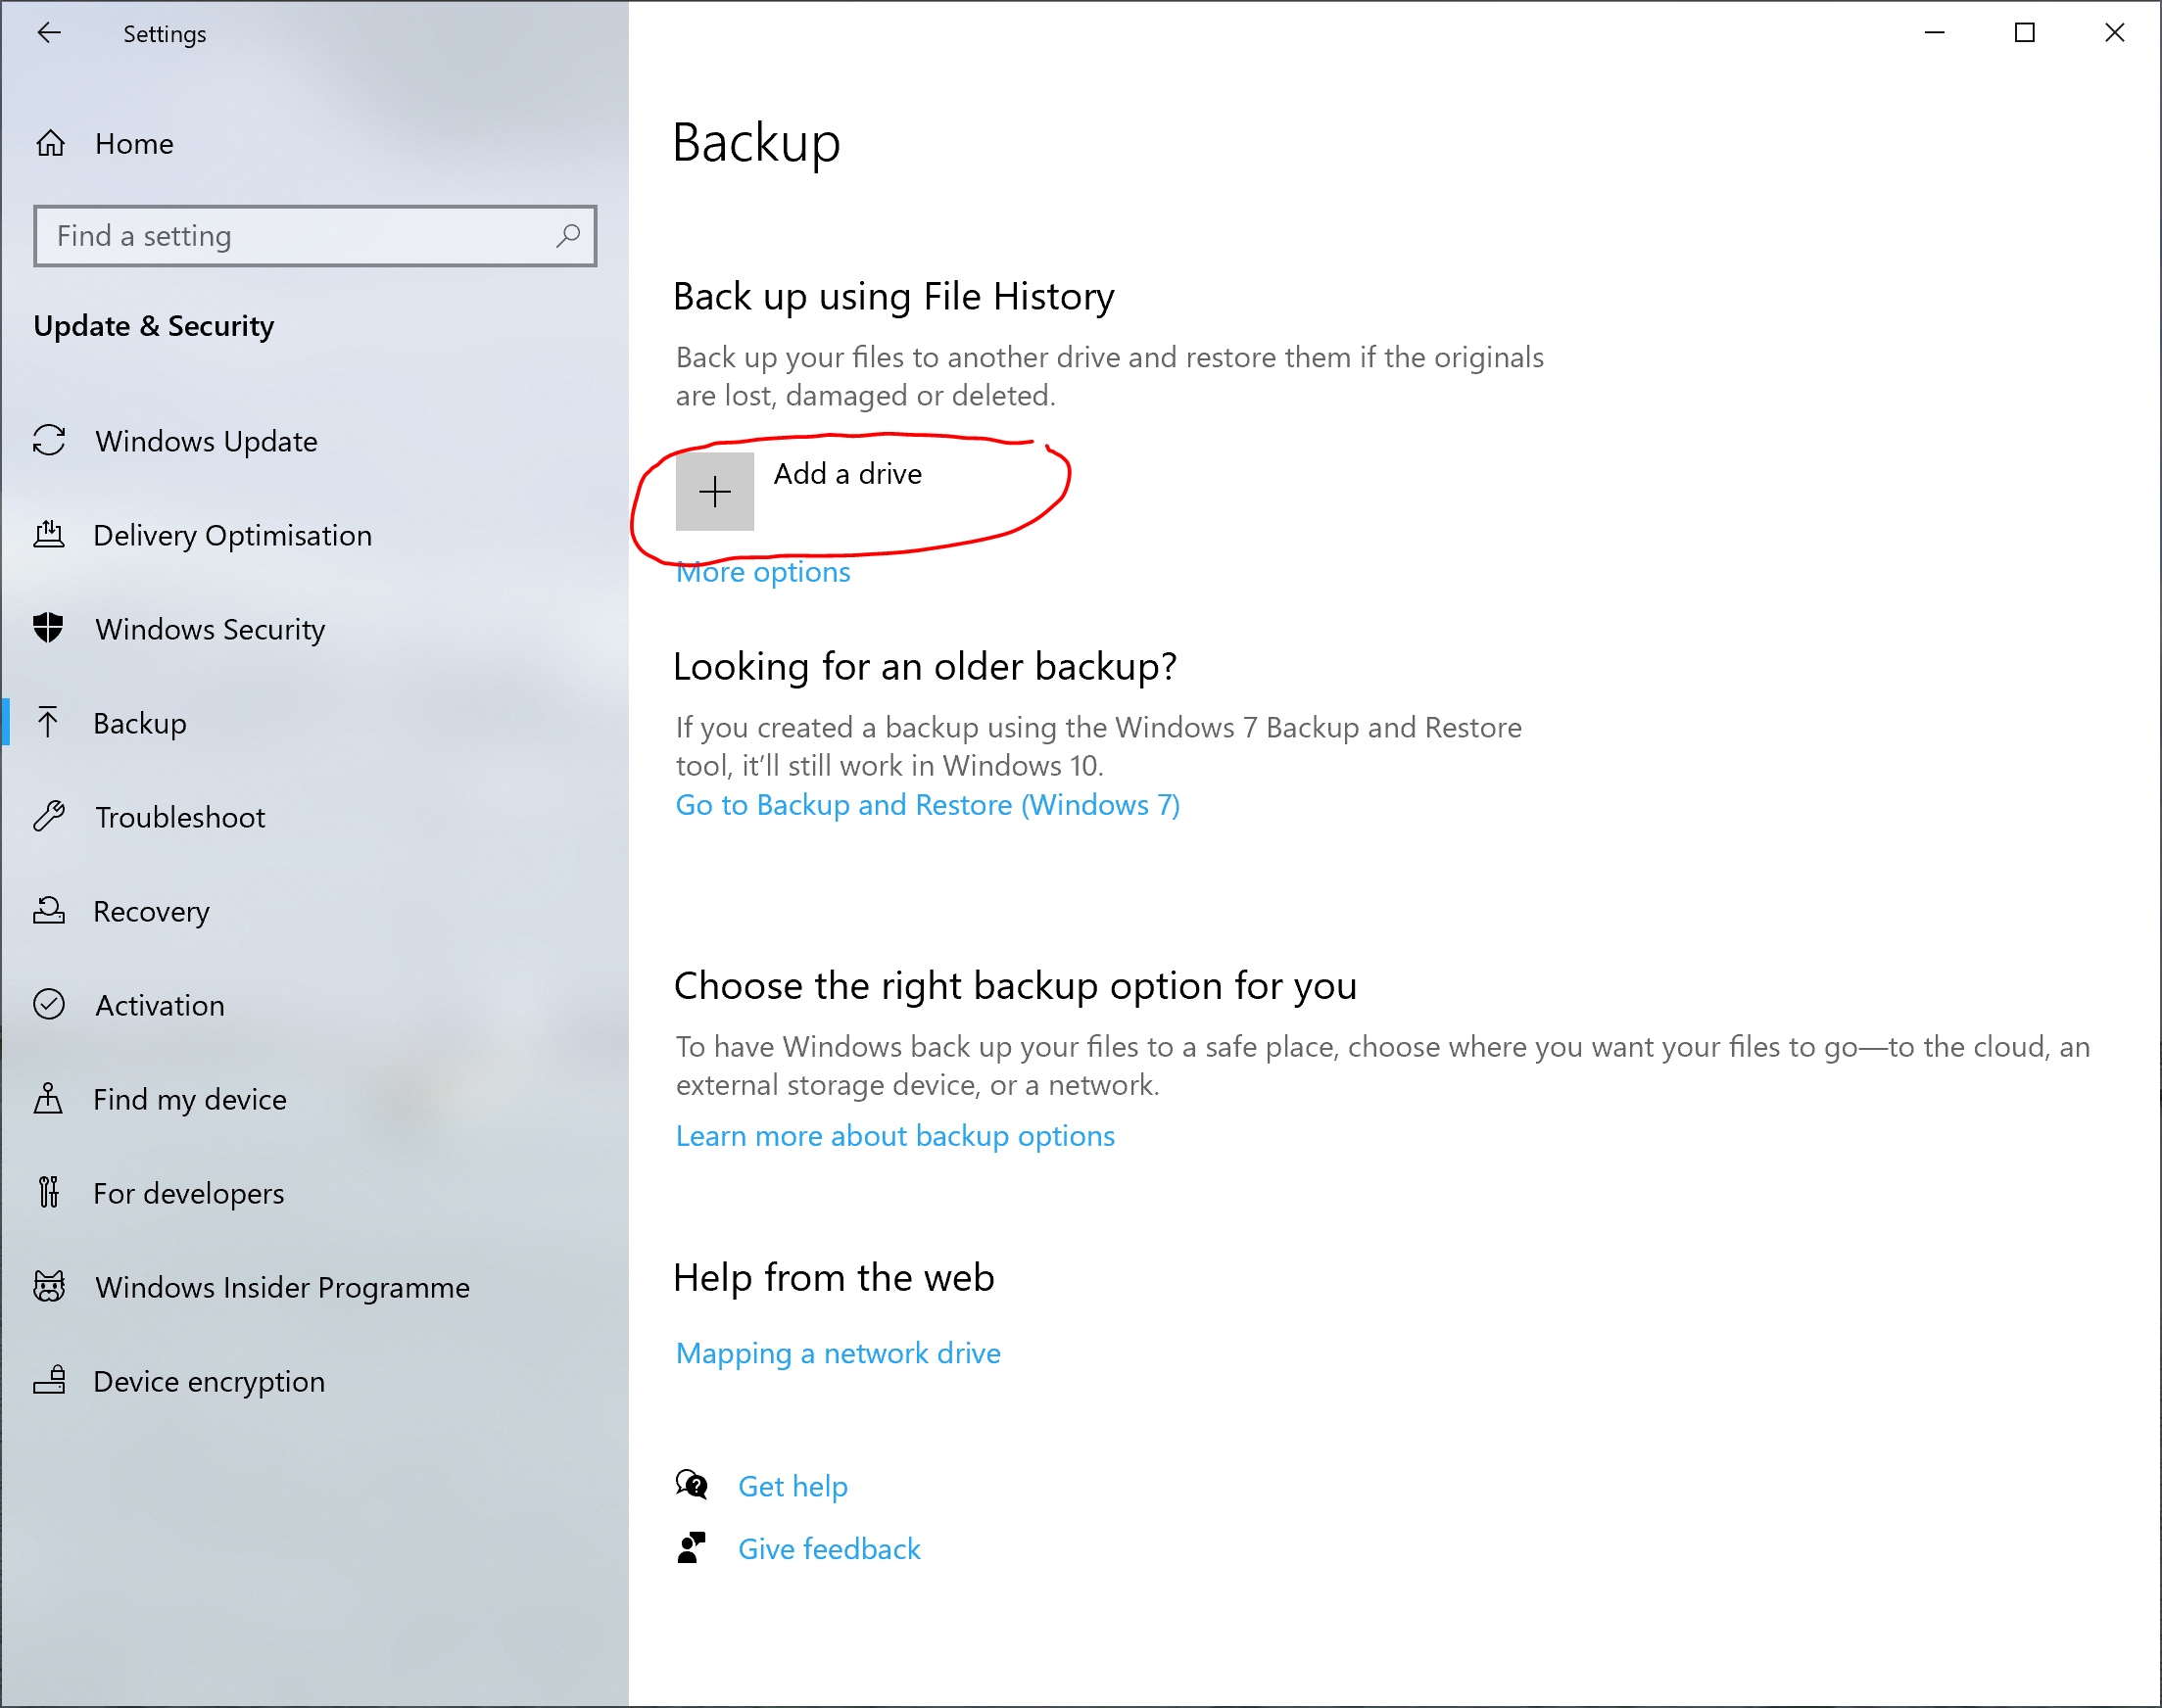
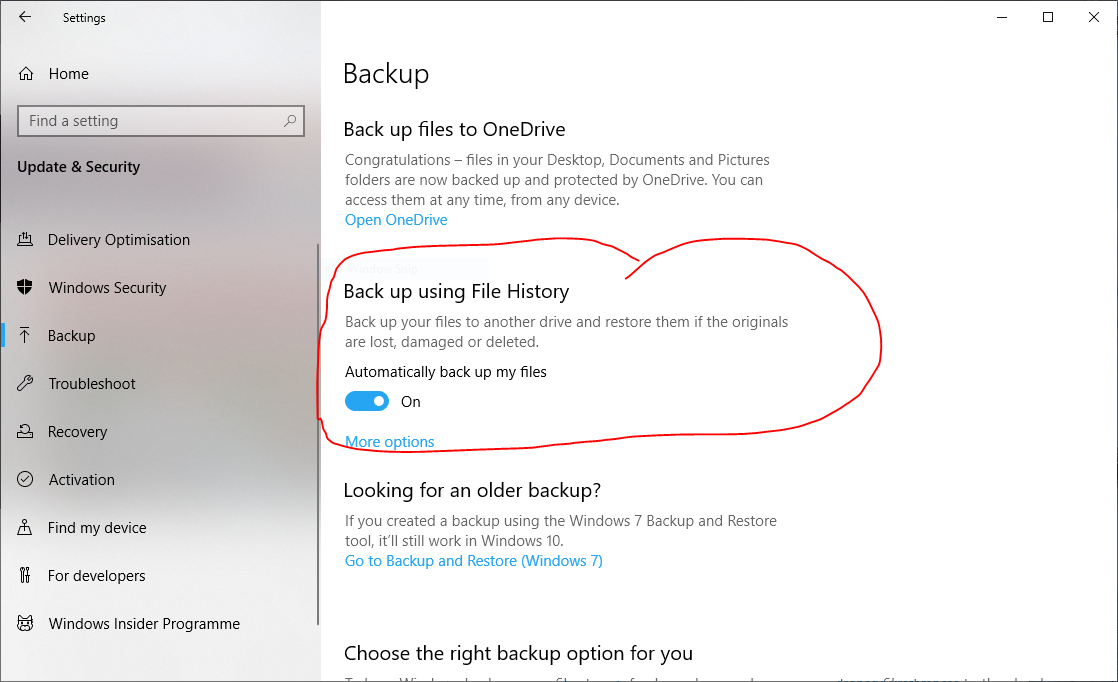
The first time that File History is used you must click on the “Add a drive” button to specify where the backups will be stored (see figure 1).  Once this has been completed, the screen will change to that shown in figure 2.

If File History has been configured previously, make sure the “Back up using File History” toggle switch is on (see figure 2).

windows 10 file history initial configuration
Figure 1: File History first time use

By default, File History will backup all the files and folders in the current user’s home folder e.g. C:\Users\SOME_USER. It will do this once per hour.

It will not…

  • backup the home folder of other user accounts that may exist on the PC
  • backup files or folders that are located elsewhere on the PC
  • nor will it delete any of the backups that it has made

The last point means that without manual intervention, File History will eventually consume all of the available space on the backup drive.  That’s something to keep in mind if you specified an unrestricted network location earlier.


windows 10 file history toggle switch on
Figure 2: File History previously configured


Clicking on the “More options” link (as seen in figures 1 & 2)  will display the Back-up Options screen as seen in figures 3 & 4.  This is where  the File History’s default behaviour, can be customised.

windows 10 file history backup default options 1 of 2
Figure 3: File History default backup options 1

Using this screen folders can be explicitly excluded from the backup or the backup location can be changed.

windows 10 file history backup options 2 of 2
Figure 4: File History default backup options 2

Before leaving the “Backup Options” screen remember to scroll back to the top and press the “Backup now” button (see figure 3) to test your File History configuration.

Next I’ll cover how to restore a file or folder from a File History backup.

Save Energy: Uninstall Unused Applications from your PC

Receiving a new PC is exciting. The unboxing, the installation and then the promise of more power, new features and new possibilities. An important part of my new PC installation process involves removing bloatware.

During this process I will identify and remove any application that has been installed on my PC by default, but I will never use. Candy Crush on Windows 10 – springs to mind. Thanks Microsoft. 🙃

Why bother uninstalling Windows software?

I consider removing software that you don’t want from your PC to be best practice. Not only does it preserve your PC’s resources for those tasks for which it was purchased, it will also reduce the attack surface area that is available for malware to exploit. In addition, you are able to eliminate its updates and the associated download costs (storage and network bandwidth).

How do you uninstall Windows software?

This requires a little bit (sometimes quite a lot) of detective work, but here’s the process that I follow.

  • Identify unwanted software
    • Browse the Windows Start menu and note any trial or demo applications
    • Use Task Manager to identify and note any unwanted start-up applications
    • Use Task Manager to identify and note any unwanted running applications or processes (see fig 1)

      task manager column sort command line windows 10
      fig 1: Identify unwanted applications using Task Manager

      • The application list can be sorted by clicking on a column heading e.g. Name.
      • You may need to add the Command Line column as it’s not displayed by default.
  • Create a Windows System Image
  • Create an up-to-date Windows System Repair Disk
  • Launch the Settings Apps and Features app
    • Select and uninstall each application that appears on the list of unwanted applications that you created earlier (see fig 2)

      settings apps and features app uninstall
      fig 2: Uninstall unwanted Windows applications

      Click on the application that you want to remove to reveal the Uninstall button

  • Reboot the PC

Final Thoughts

Uninstalling unwanted software benefits your PC in many ways including:

  • Increasing the amount of storage (disk space) available
  • Reduce the amount of active memory that is in use
  • Reduce network utilisation
  • Reduce CPU utilisation
  • Reduce the time and other resources that are required to update your PC
  • Reduce the opportunity for malware to be installed on your PC

Fewer things running on your PC should result in a small reduction in energy consumption and that has to be a good thing.

Speed up Your PC Start Up: Manage Windows Start-up Applications

Sometimes trying to sign into to your PC involves waiting for your key presses to be registered, which if you’re busy can feel a bit like one of the Labours of Hercules.

A slow sign-in experience can be caused by many things such as defective or slow hardware. In this post I will look at one possible cause, the applications that Windows launches automatically every time that you sign-in.

Your PC may have shipped with some applications that have been configured to run in the background. Some will periodically check for updates; others will monitor your activities to protect you from malware (which can also consume precious PC resources).

Whilst others, that are never use and so serve no useful purpose will also be competing for network bandwidth or CPU time. Any application that falls into this last category should be uninstalled (remember to make a system image first).

Applications that start automatically can be managed from either the Start-up tab in Task Manager (see fig 1) or the Startup apps section of the Settings app (see fig 2).

task manager start-up tab windows 10
fig. 1 start-up applications in Task Manager

settings app start-up apps windows 10
fig. 2 start-up applications in the Settings app

Although there are slight differences in the information that is displayed, disabling a start-up application is the same no matter which route you choose.

You will be presented with a list of applications that have been configured to start automatically, the impact they have on the PC’s resources (disk and CPU) and their status (enabled or disabled). All that is left to do is to decide which of these applications should be allowed to start automatically.

Final thoughts

Following these steps should help you to improve your PC sign-in experience.

Need more help? Try searching our archive for alternative solutions.

Make a Windows System Image: Snapshot Your PC a Camera is not Required

Following on from my previous blog post about backups, today’s post looks at creating a Windows system image backup. A Windows system image is a type of full backup that includes all of the data, applications system files and drivers needed that your PC needs to function properly.

How are the images used?

They are used to restore your PC to its exact state as at the time the image was created. It will restore all data and applications without the need for their original installation media.

When should you create a system image?

The best time to create a system image is just before any significant change is made to your PC. For example, when upgrading your PC from one version of Windows to another or before installing new hardware with its associated drivers.

Where should an image be stored?

As with any backup, system images should be stored securely and they should be verified so that you can be sure they will work whenever they are needed.

How are images made?

  1. Launch the Control Panel application by pressing the Start button and searching for Control Panelstart-button-search-control-panel-windows-10

  2. Now select Save backup copies of your files with File History optionsave backup copies control panel-windows-10

  3. Click on System Image Backup in the bottom left corner of the File History screensystem image backup file history windows 10

  4. Choosing the Create a system image option will open the following window.

    create a system image windows 10

    Fill in the details as required and press the Next button to create the image

Final thoughts

  • Make sure to include all of the internal storage drives when creating a system image, as any that are excluded will be erased when the image is used

  • It’s a good idea to create an up-to-date system repair disc whenever you create an image, because you will need it to restore an image to a new or empty disk drive

Make a Backup: Defend Against Disaster

We store ever increasing amounts of our data digitally and we trust our technology to keep that data safe until we require it. However, data stored this way is still vulnerable to loss from erasure, corruption, encryption by ransomware or technology failure. Therefore, measures must be taken to protect it.

What is a backup?

For our purposes, a backup is just an enduring copy of our data that protects us against some or all of the aforementioned vulnerabilities. It can be created manually or automatically; it can be full or partial.

Given this definition, it follows that by creating a copy of an important document and storing it in another folder on the C: drive you would not have made a backup. This is because if your C: drive fails, both copies of that document will be lost.

The “Enduring” nature of your backup will be subjective and will inform the sophistication of the backup method you use. For example, should you wish to defend against accidently deleting information whilst editing a document, then a simple approach will suffice. On the other hand, if your data changes frequently and you intend to defend against any loss a more sophisticated solution will be required.

How are they used?

Having a backup enables us to restore our data to a known state if it becomes unavailable. Should the storage in our PC become damaged, it can be replaced, and our backup used to restore our important data.

When should a backup be made?

The amount of data that you are prepared to lose will determine how frequently a backup needs to be made. For example, if a document only changes once a week, then a backup need only be taken immediately after its creation and then again after every revision is published.

Where should a backup be stored?

The short answer is on another device, preferably in a different location. Depending on your circumstances and the value that you place on the data to be protected, this could be anything from a SD card that is put in a drawer, to a Cloud based solution. Whatever you choose, remember to keep the backup safe and secure.

How are backups made?

There are many options for creating backups ranging from in-house scripts, through Windows built-in utilities to third-party offerings. Each will have its own requirements, performance characteristics, cost and nuances.

Final thoughts

Having made your backup, remember to verify it. This will ensure that you know that your backup is a good one that can be relied upon.

If your data is important, valuable or impossible to replace then making a backup should be very high on your to-do list.

In this series of blog posts, I’ll be exploring some of the backup solutions that ship with Windows, so register for updates or search through our archives for other backup related content.